Monday, January 30, 2017

Make It Mail-able Monday week 2

Decided to make a masculine birthday card for today!  It actually matches the newest tutorial that will be coming out tomorrow!  So if you were to purchase that tutorial you would have an extra card for a total of 7 cards using the same limited supplies!  More about that later...Let's focus on today's card shall we?


 I used the new stamp set High Tide from the Occasions Mini and the Happy Birthday sentiment from Designer Tee from the Sale-A-Bration catalog.  I also used the paper pack Sending Love--all supplies can be purchased at the end of the post if you are at all interested! 

  • The base of the card is Basic Black Cardstock the is 8 1/2" by 5 1/2" that is folded in half to create card base.
  • The next layer from the bottom up is a 4 3/4" by 3 1/2"  piece of Basic Gray Cardstock. 
  • On the bottom 3" of this layer, I added two strips of Real Red Cardstock alternated with two strips of striped designer paper from the Sending Love paper pack.  Each of these strips is cut to 7/8" by 3". 
  • Next, I added a strip of Basic Black Cardstock that is 3 1/2" by 3/4" over the top edge of the previous strips.  See picture above for clarification.  This entire element is attached to the front of the card base. 
  • Now you will want to stamp the lighthouse onto a 1 3/4" square of Whisper White Cardstock. The base image is stamped with Smoky Slate ink and the top part of the image is stamped with Real Red.  Add the light streaming from the lighthouse with Daffodil Delight ink. 
  • Layer this element onto a Basic Black square that is 1 7/8".  Add to the upper right-hand side of the Basic Gray layer as shown above.  
  • Finish off this card by stamping the Happy Birthday sentiment in Black ink onto a small scrap of Real Red Cardstock and cut out.  Add to front of the card as shown above.  Simple and cute!  Great masculine card.  Here is the inside of the card....


The inside is very simple and I did not add an inside sentiment as I tend to like to write mine and this was actually created for someone particular.  The Whisper White Cardstock is 3 3/4" by 5" and the birds are stamped in Black ink.  The strip of designer paper is 3/4" by 3 3/4" 

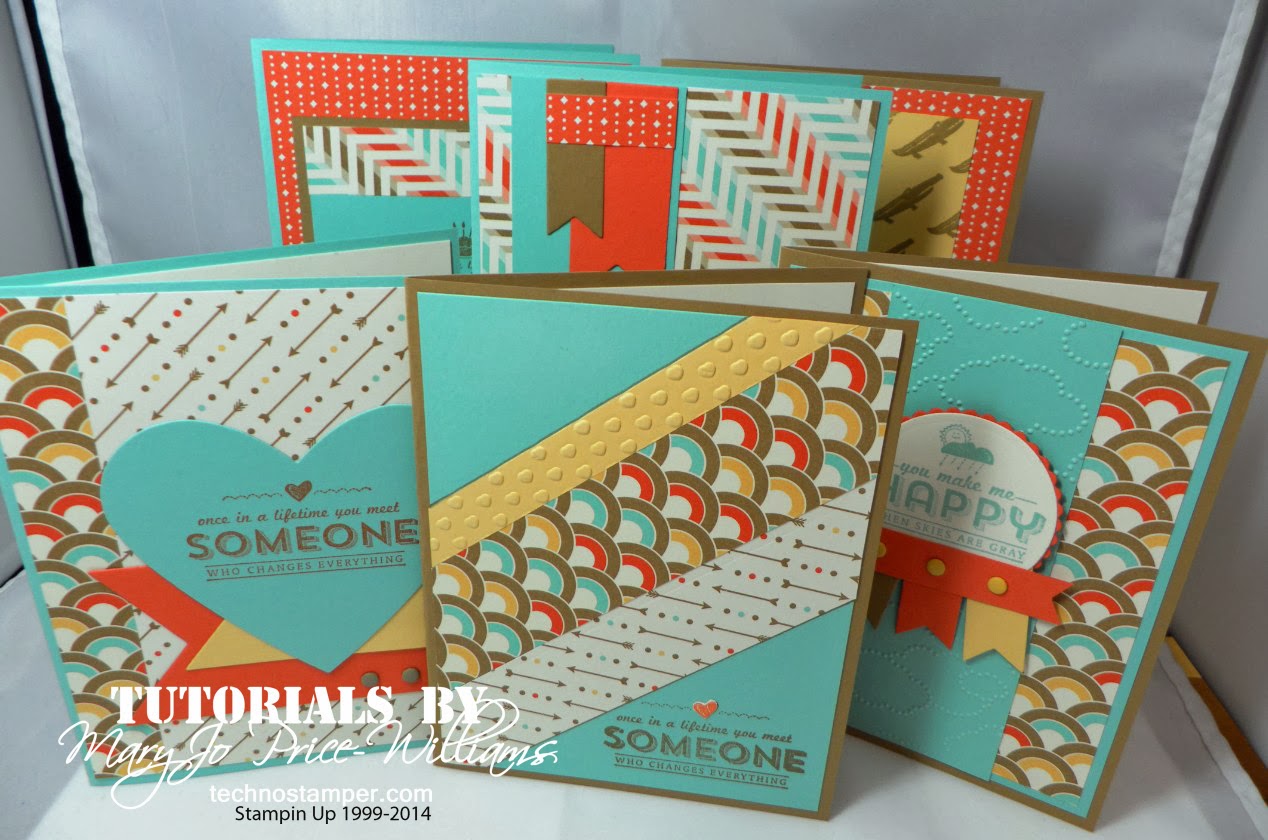
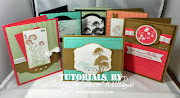
I hope you enjoyed today's card.  Here is a little sneak peek of the new tutorial that will be available sometime tomorrow.

This tutorial will have six more cards using the same supplies I used for today's card.  And as always it will be available for only $3--affordable ideas for your stamping time.  

Here is the supply list for today's card.....


Thanks for visiting today! Mary Jo

Monday, January 23, 2017

Something New! Make it Mail-able Monday!

So I am going to try out a new thing here on the blog--each Monday I will post a Make It Mail-able Monday card for!  Each card will be fairly simple and will not have a lot of embellishments on it so that it can be mailed with a regular stamp and no added padding or anything.  I will also give you a quick mini tutorial with cut sizes and any details you may need to create the card.  I hope that you will enjoy this new idea--leave me any feedback you have--good or bad.  I appreciate it all!

So here we go--we are going to begin with a great birthday card the was created for the CAS(E) this sketch #205 challenge for is week......


I honestly was not sure I liked the sketch when I first saw it but I really love the card.  I think it is so classy looking with the black and red theme.  I used the new stamp set Beautiful You from the Occasions Mini along with the paper pack Sending Love--all supplies can be purchased at the end of the post if you are at all interested! 

  • The base of the card is Basic Black Cardstock the is 8 1/2" by 5 1/2" that is folded in half to create card base.
  • The next layer from the bottom up is a 5 1/4" by 4" piece of Basic Gray Cardstock.  I used Memento Black Ink to stamp the in style sentiment across the bottom and along the right-hand side as shown in the picture above. 
  • The next layer up is Basic Black cardstock cut to 4 3/4" by 3  1/2". This layer is aligned even with the top left corner of the Basic Gray card stock below it.  You only want the Basic Gray to show on the bottom and right side.  
  • Next is a layer of Designer Series Paper from the Sending Love paper pack.  The paper is cut to 4 1/4" by 3".  This layer is aligned with the top right corner of the Basic Black layer below it--allowing only the bottom and right side of the black layer to show.
  • Next, you will need a piece of Whisper White Cardstock that is cut to 3" by 2" .  I used a black marker to edge this layer.  I do this a lot to add depth without adding bulk or weight.  Now stamp the woman that is facing forward onto this element using Memento Black Ink.  Color in the face and hands with the new watercolor pencils and a blender pen.  The dress is filled in by using the paper piecing technique.  This has long been a favorite of mine and these beautiful ladies are perfect for it.  I found another piece of designer paper from the same pack--the red with little red hearts--and stamped the woman on it in black ink.  Next, I cut out just the dress from the newly stamped image--the trick is to cut right on or just inside of the lines so that when you glue it to the image on your focal element it looks like it is a perfect fit!  I chose to do the hat in the designer paper that was used in the previous layer of the card.  After you glue your cut out designer paper to the original image you will attach this entire element to the front of your card about 1/4" from the bottom right corner of the designer paper layer--see image above.  
  • Finally, stamp the sentiment celebrate on a small piece of Whisper White Cardstock that is 2" by 1/4".  Use your scissors to trim both ends into a banner type cut.  I used the marker again to add a slight black edge on this to make it pop a bit.  I attached it with dimensionsals.  That is it!  Quick--Easy--Mailable card.  
Here is the inside of the card....


The inside is Whisper White Cardstock that is 4 1/4" by 3 1/4".  I used a black marker to edge it then stamped the larger of the two scribbles in Real Red ink that has been stamped off one time on scrap paper then without re-inking I stamped it on the Whisper White.  I stamped the Happy birthday sentiment in black ink over the top of it.  Next this is layered onto a 4 1/2" by 3 1/2" piece of Basic Gray.  This entire element is attached inside of the card to finish it off.

Here is the actual sketch from the challenge....


And the supplies used: 


Thanks so much for stopping by today!  Don't forget to check out my most recent tutorial using the Hey, chick stamp set HERE.


Wednesday, January 18, 2017

Hey, Chick tutorial

It is here!  

The first tutorial in a long long time.
Same as before.
Easily reproducible cards or projects.
Step by Step directions with lots of pictures.
One stamp set and limited supplies so they are great for classes! Each card has it's own page with directions and pictures! 

tips and techniques -- supplies needed on one sheet
want to prep all papers before sitting down to create--you can because the tutorial will tell you exactly what you need and what sizes all on one convenient page.  

Immediate download of PDF file 

Only $3.00


I am so happy to be back--I am starting off with this adorable chicken set that you can earn for free during this year's Sale-A-Bration with your purchase of $50 in product from the current catalogs.  I think this set is just darling--so many cute designs with it.  This tutorial will include six new layouts all using the same stamp set and limited supplies--so go ahead and use them for classes (but do not alter or take off my contact information) or just create for your own personal use.  Layouts can be used again and again with different papers and stamps--well worth the small price!  I want to keep them affordable so everyone can create!

Because this is the first one in quite a while I am going to give you an older one for FREE with your purchase--as a thank you for coming back--or if you are new to my tutorials for trying them out. 

 I thought the Love You tutorial would be appropriate for this time of year it is a cute coupon book!  The stamps are retired but the project is so fun!  You can substitute our new adorable Valentine stamps!  

Two for the price of One

$3.00

Thanks so much for checking out my blog today!
Mary Jo